Wednesday, May 21, 2014

Building a Worktable: Part III - Final Installment

Well, after a valuable lesson in reading the directions and selecting the correct adhesive, my worktable (See part 1 and part 2) is now ready to enter service.  The first adhesive for the sheet metal top I chose was whatever was in reach at the hardware store that said "Liquid Nails" on it because when I was a young man, there was only ONE kind... the kind that you never, ever, undid.  It just worked.  Now with the different chemicals that are known to the state of California to be bad for you, most adhesives are specialized, for some purpose, silicon rubber of one kind or another.  Near as I can tell, they are mostly all varying grades of caulk.

Taking some time to read the instructions proved valuable as I found this amazing stuff:

For when Duck Tape just won't cut it.

Loctite™ PL Premium Construction Adhesive. Made for metal and non-porous surfaces. Forgetting to wear my respirator may be why I had a sore throat this morning (or I caught the bug the kids are passing around) but this stuff really did stink going on and had I read the instructions a bit more, I would have discovered that, yes, a respirator is recommended.  Ah well.  I as yet live.   More importantly, the sheet metal table top is FIRMLY secured and flat as a 'possum that's been laying in the road for a good week or two.

In preparation for using the correct adhesive, I did scrape and sand away the wrong adhesive before applying.  Hopefully this will hold the table top down for the life of the table.  If not, I am prepared to drill, counter-sink and screw it down but for aesthetic reasons (eye roll) I didn't want to do that if I don't have to.  I also didn't like the idea of screw heads, recessed or not, gathering gunk and looking dirty.  I'm not a clean freak, but some things I do get OCD about.

Here's a few more shots of the table.  I will probably stain it but don't plan to post any more pictures except as incidental when discussing future projects that will probably be built upon this table.  It has certainly been a worth-while and fun project.  It's very motivating, too, as I now know I have a place to work on things where previously it always meant clearing off the garage floor or setting up a rickety saw-horse table.

Reclaimed Materials - Evidence of Age and Use = Beauty

Showcase Shot at Sunset
Center of the Table


Saturday, May 17, 2014

Building a Worktable, Part II

I've been building a worktable this week from salvaged wood and sheet metal.  Today, I assembled the top.  While I was prepping the metal, I decided to get a little creative and experiment with applying a patina to the sheet metal.  After studying several different approaches and taking a quick inventory of what I had on hand, I decided to try both a black and a blue patina.  Both require different processes and equipment and I ran into a little unexpected problem, but it was a good learning experience.

First thing I decided to do was set a pattern of colors rather than just random shades of blue, black and rust. Using simple painters masking tape, I taped off my pattern.  This was to provide a mask for the black patina,which I was going to be applying via a spray on rust treatment.  It turns metal black by chemically neutralizing rust.

Taped and ready for spraying


Once I sprayed a light coat on, I peeled off the tape and moved on to the bluing.  I decided to heat-treat to apply the patina, which worked well, but this is where my problem started.  Since heating metal causes it to expand, and I was only heating areas that I wanted blued, I wound up with a wavy sheet of metal.  This would be fine for artwork, but for a supposedly flat table top, not so good.

At any rate, I used a MAP torch to heat the metal until the blue patina began to appear.  The metal heaved all along this area and then receeded as it cooled but the warping remained.  The effect however was very interesting and fun to play with.  I want to try other patinas in the future now that I've had a play with it. One thing that I think looks like absolute crap is the way the rust treatment came out.  It apparently needs to be rolled on or wiped on in an even layer.  I plan to go back over the table top, re-taping it and then wiping on a few more coats to get a uniform black.  You can see below the graffiti effect from just spraying back and forth.  Live and learn.

Did I say spraying?  Should have rolled or wiped it on evenly.

I did find some interesting effects with the torch and the rust treatment where they interacted.  It gave the coating a nice brown effect that I actually much prefer to the black.  Lemon juice left to etch steel for several hours will brown metal.  In the future, I want to try that out as the brown, leathery look is very appealing to me.

While the metal sheet cooled on flat concrete, I used a scrap piece of 3/4" plywood to create the reinforced base for the table top.  This got glued and screwed to the table base which was now fully assembled.  Once I had that done, I put the salvaged and de-formicaed table top upside down on the garage floor and traced the outline of the base on the underside of the table top.  Then I squirted half a tube of liquid nails all over within the outline and used a piece of plastic to spread it out somewhat evenly.

After laying the table base down on the table top, I screwed it together with more cabinet screws.  At this stage, the table was really feeling solid.  I could have left the metal top off and had a very strong and sturdy table and called it a day.  But, I wanted my metal table top, so now I had to deal with the warping.

Turning the worktable back over, I put the sheet metal on top to see if the warping could be overcome just by weighing it down and gluing it.  Not a chance - too much deformation had been created by the heat treating.  So out came the trusty 3lbs. hammer and using the same scrap of plastic I used to spread the glue as a sacrificial barrier, I hammered out the high spots until the sheet was relatively flat, or flat enough that weights and clamps would get it down on another layer of liquid nails.  
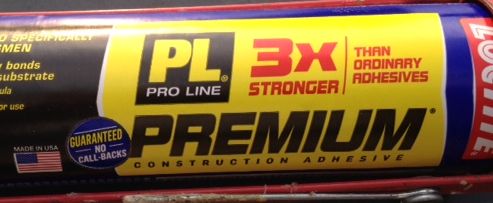
IMPORTANT: Make sure the adhesive you use is for METAL.

Hammering it out was a noisy affair, but the work table felt very solid underneath it and it was easy to tell when I had a section flattened out by the lack of deflection caused by each blow of the hammer.  The hammering added an interesting dimpled effect that I hadn't planned on, but like most accidents that add interest to things I build, I don't mind leaving it.  It sort of looks like it's supposed to be that way and I don't mind it.  Call it a "distressed" look if you like.

One thing I also experimented with today was blackening wood to see if I wanted to do that as a treatment for the wood base of the table.  As it turns out, pine doesn't blacken as well as hard woods and the effect is too inconsistent.  It's neat, but not what I wanted to see.  So, I'll use some left over wood stain instead (I have no shortage of that) and just put a good dark walnut stain on it after I soften up the wood with some soft-wood primer.  Eventually, I'll be building a lower shelf to sit upon the bottom stretchers and might work a cabinet into the base of the table, but for now, there are projects besides this table that must be completed as soon as possible, so it will be going directly into service this week.

Once I have it stained and the top patina finished to my liking, I'll post up two more pictures of the final product.


Thursday, May 15, 2014

Building a Worktable

One thing every home shop needs is a sturdy work table.  A work bench is usually the place you mount your bench top tools or store endless capsules of scavenged screws and spindles.  A work table is a critical support in any shop endeavor.  It's an extra pair of hands, a light-duty anvil, a paint stand, a drafting table, a seat, a pedestal and a place to store things that just don't have a home yet.

My garage is my shop.  I have long wanted to build a shop but materials and finances are not aligning to that end, so the garage has been claimed, the vehicle evicted, and the materials stock-piled.  The mice have been quite happy.  But my garage is a cluttered mess.  I would post a picture but I fear the shock would drive my readers away forever -- all two of them.  So the first major task I am undertaking is making a work table.

To get us started, I did what any modern man would do and googled for plans or videos.  I found the following video very helpful and it is the pattern upon which I am building my table, minus the wheels, and I'm adding a steel top.  I don't like the wobbly feel wheels gave the work bench I created for the kids.  It just doesn't feel solid, though it serves their purposes well.  I want a work surface that is one with the planet and moves nowhere unless intended, so my table will be heavy and solidly built.


To get started, I'm using salvaged materials happily gleaned from a nearby dumpster (with permission).  I pulled some 4 x 4 pine beams (untreated) from heap and also three friends from work gave up scraps from their garages to supply the 2x4's and the table top.  I bought some 1/8 inch steel plate from another co-worker which will be cut to cover the top to provide a rock hard work surface that will take a lot of abuse.

Here are some starter pictures and more will follow.  The dimensions I have chosen are to fit the table top that I inherited.  The table top, by the way, came with some really beautiful pink and gold fleck Formica veneer... and what a joy it was to peel that off and toss it.  The top itself that remained consisted of oak and 1/4" high density fiber board.  I give this detailed description as it is not yet pictured.

Here are the sides after assembly.

Legs, glued and screwed.

And here they are a few days later mid way through final assembly.  The stretchers on the floor are already glued and screwed in.  The one's on top had to wait for a trip to the hardware store.  I have fallen in love with the green-coated decking screws for most heavy duty assembly jobs and had to buy some.  Salvaged drywall screws are great for most things, I built out most of my basement with them, but now that I have experienced the joy of the low friction corrosion resistant screws, of which screwing into wood is amazingly easy (especially with a pilot hole), I can't do without them.

Table base nearing completion
Last picture for today is the sheet metal I bought for a reasonable price.  It came from a guy who once owned a motorcycle dealership.  He has an amazing collection of Honda Goldwings and Valkyries.  Part of the sheet was cut out with a plasma torch and used for some long ago project.  The rest is big enough to cover my table and I have a couple of ideas of how I might cut it down.  I'm still toying with the idea of folding it over the edges of the wood top which will be reinforced with a layer of plywood, glued and screwed, or just cutting it to fit the edges.  One complication is that the salvaged table top has rounded corners, so it might work better just to cut the sheet metal to fit the top surface and adhere it with some liquid nails.

Sheet METAAAL

It almost looks like someone drew a picture of a road bike on that metal.  I didn't notice it till the camera flash picked it up.  Anyway, I hope to have the table completed within the week.  Soon enough I have other projects that need to get started and the table will be a big, and necessary, part of those projects.

Also see Part 2 and Part 3.